Wednesday, July 12, 2017

Gear Review - Streetwalker Harddrive v2.0 and Streetwalker Rolling Backpack by Think Tank Photo

Think Tank Photo recently released v2.0 of their popular Streetwalker series of camera backpacks and we were able to put two of them through their paces and review them for our readers - the Streetwalker Harddrive v2.0 and the Streetwalker Rolling Backpack v2.0.

For reference, we will be comparing them to the Streetwalker Harddrive backpack v1.

(from left to right - Streetwalker Harddrive v1.0, Streetwalker Harddrive v2.0, & Streetwalker Rolling Backpack v2.0)

We're going to skip over the usual tech specs of each backpack, as you can see all the measurements on the product pages at the Think Tank Photo website.

Size-wise, the bags are all pretty much the same.  There are minor differences once you get into the bags.


The typical loadout we use in these bags when on wedding and event assignments consists of:

3 camera bodies - the Sony a7rii, Sony a7ii, and the Sony a6300 - both a7 series cameras have Sony battery grips, Peak Design Clutch handstraps and Spiderholter plates attached.
Zeiss 24-70 f4 lens
Zeiss 16-35 f4 lens
Sony 70-200 f4 G lens
Sony 85mm f1.8 G Master lens
Sony 30mm Macro lens
Sony Fisheye lens
Sony 10-18 f4 lens (mainly for the a6300)
Think Tank memory card case with 8-32GB Sandisk cards
Think Tank battery case with 4 extra batteries
2 - Yongnuo flashes and Yongnuo transmitter
MagMod Maggrips attached, with grid and gel set.


Streetwalker Harddrive v2.0

For the following images, the v1 is pictured on the left, and the v2.0 is on the right.

(v1 on the left, v2.0 on the right)

The Streetwalker series of backpacks is already one of the best camera backpacks around, so there wasn't much the people at Think Tank Photo could improve upon.  Most of the changes in v2.0 are very minor compared to v1.0.

Outside the bags look very similar:


Below on the v2.0 on the right you can see where they moved the loops for the tripod attachment straps from the top of the bag to the front just above the outside pocket. This allows you to access the inside of the bag while still having the tripod attached to the outside of your backpack.


Access to the laptop/tablet section has moved from the side of the bag to the top of the backpack.

The laptop compartment is now a completely separate compartment from the main interior of the backpack and also includes a slot for an iPad.

Inside the layout is pretty much the same as the v1


If you look closely at the top section of the bag, you'll see a small change.


On the v1 where the laptop section starts, you can see a small shelf - this is was because the laptop section of the v1 was a sectioned off part of the main interior.  On the right in the v2.0, since the laptop section  is now completely separate from the main bag, that shelf is now gone.

Below you can see how the same camera body (Sony a7rII with battery grip and Spiderholster plate attached) looks in both bags:


As you can see, there's not much difference in depth between the two bags.


The other small change is to one of the long dividers near the bottom of the bag.  They made it hinged so that you can position it over to the side to make room for another camera body with lens attached.  While you could do this with the older v1 bag, it's easier to do now on the v2.0.


So you can now store both camera bodies with the lenses attached if you want.


Streetwalker Rolling Backpack v2.0


I don't recall ever seeing a v1 of the Streetwalker rolling backpack.  The only rolling bags with backpack straps I've seen from Think Tank were the Airport Security v2.0 and the Airport Takeoff.

Streetwalker Rolling Backpack v2.0 compared to Airport Security v2.0:


The Streetwalker Rolling Backpack v2.0 gives you the option of using it as just a roller bag, or as a backpack, or as a roller bag with the backpack straps tucked in the bottom for fast access.

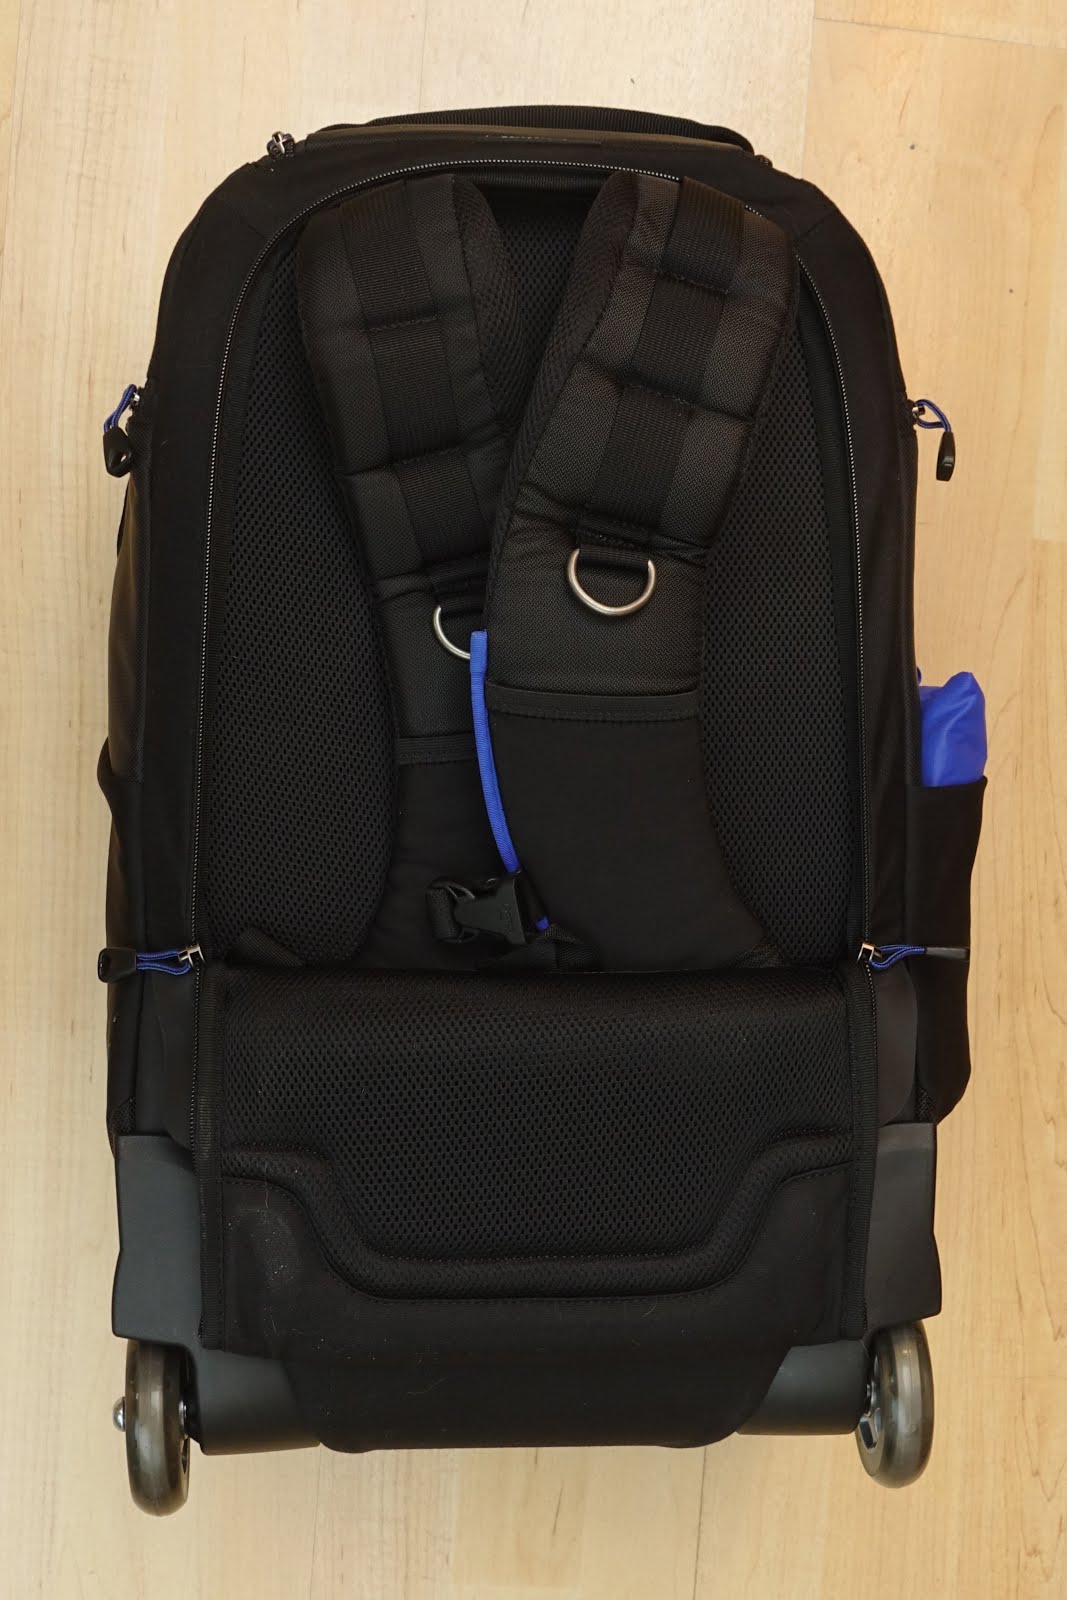

Compared to the Airport Security v.0, the Streetwalker Rolling Backpack is a lot more comfortable on your back since there is much more padding.


Compared to the Streetwalker Hard Drive v2.0, the layout of the inside of the backpack is pretty much the same.

(Streetwalker Harddrive v2.0 on left, Streetwalker Rolling Backpack v2.0 on right)


On the Rolling Backpack, the laptop section has been moved to the inside of the front flap:


Since the backpack incorporates a telescoping handle, the sides and bottom are slightly deeper than the middle portion of the bag. Below you can see the bag with and without the dividers.


The bag is almost deep enough for a Sony 70-200 f4 G lens to fit standing up (Streetwalker Harddrive v2.0 on left, Rolling Backpack on right).


The bag is more than deep enough for a gripped body (Sony A7rii with battery grip and Spiderholster plate attached)


The upper section of the bag is shallower, so a gripped body might stick out a bit, which would put pressure on the hotshoe.


I usually get around this by turning the camera over on the side.


It holds the same amount of gear as the Streetwalker Harddrive:


The addition of the handle and wheels to the Streetwalker backpack does add more weight.  The Streetwalker Harddrive v2.0 is 4.5lbs while the Streetwalker Rolling Backpack v2.0 is 8.2lbs, so that is a tradeoff you will have to consider.

Both of these bags were used on several wedding assignments and both bags were very comfortable to wear and securely held our gear just as well as the Streetwalker Harddrive v1.

We did notice when using the rolling backpack,  that we tended to use it more as a rolling bag instead of as a backpack, mainly due to the added weight of the handle and wheels.

When traveling interisland, we really liked the fact that the narrower profile of the rolling backpack (as opposed to the Airport Security v2.0 ) made it much easier when rolling it through the aisle of the plane.

If you are looking for a solid camera backpack that's comfortable and not overly huge, the Streetwalker Harddrive v2.0 is a great backpack for you to consider. If you already have v1 of this bag however, there aren't that many changes/improvements that would warrant upgrading to the v2.0

The Streetwalker Rolling Backpack v2.0 is a nice addition to the Streetwalker lineup, but the added weight means you probably will want to use it mainly as a roller instead of a backpack, especially if you have a lot of gear.

As always, if you purchase any of Think Tank Photo's products by using the links on this site, a small portion of the sale will go toward helping us continue reviewing products for our readers.  Mahalo!


Friday, January 6, 2017

Finding The Light - Christmas Day Photoshoot with Kayo in Tokyo


One of the most valuable lessons I learned in photography came from Master Photographer Irvin Yamada, who told me to "learn to see the light".  If you look carefully, you can find amazing natural light for your subjects.  Even in the middle of a crowded city like Tokyo.

Kayo-Fashion Spin

Recently I had the good fortune of working again with one of my favorite models in Japan - the always amazing Kayo. I first met Kayo-san years ago through Model Mayhem and every time we collaborate on a shoot, it's always a lot of fun.  Though this was sort of a last minute impromptu shoot, we were able to create some great images in a short amount of time with very minimal gear.


The nice thing about shooting in Tokyo in December when the sun is low in the sky is that there are lots of pools of reflected light coming from the low sunlight bouncing off of the many windows and glass walls of the buildings around you.  By simply walking around, you can find lots of places where you can get both a front light and back light. Then all you need to do is put your subject in that spot.


These were all shot in a park next to our hotel - no need for a reflector or even fill flash. Pretty much everything was shot with the sun behind the model and the reflection from a nearby window filling in the front.

Everything was shot on a Sony a7ii with either the 55mm f1.8 Zeiss lens or the Sony 70-200 f4 G lens.


At one point we did get stopped by a security patrolman who informed us that doing a photoshoot in this park without a permit was not allowed, so we moved to a spot on a bridge just outside the park to continue our shoot.

Kayo-Park Bench


The 55mm f1.8 Zeiss was a lens that I had just picked up on this trip and I really liked how it looked shooting wide open.


It was a bit chilly that day, so we wrapped after a few more images and headed back indoors.


I'm really glad that I had the chance to work with Kayo-san after such a long time. Not only did I get to hang out with an old friend, it also gave me the chance to test out a new lens and get more practice in "Seeing the light".

Tuesday, October 25, 2016

First Shoot for Zivity - Morticia Addams Boudoir with Floofie


Had the opportunity to work with model Floofie when she was here in Maui again, and this time we collaborated on a Morticia Addams themed boudoir photoshoot to be featured on the Zivity website.

For lighting and set reference, we looked at scenes from the movie "The Addams Family" starring Angelica Huston. As we had limited time and a minimal crew to setup and shoot, we had to stay very simple with our set. We decided to go with creating a corner of Morticia's bedroom.


The background is a folding panel and tree from Pier 1 Imports.  Next to that is a grey backdrop from Botero backgrounds. This would serve as our bedroom walls.

The bed was simply a desk covered with a down comforter and some blue satin sheets from Ross Dress 4 Less.

We used 4 Alien Bee 800s lights with grids to light this set:

1 AB800 was set up behind the folding panels, fitted with a grid and a blue gel.  This was fired into the wall of the studio directly behind the panel to blow it out and give the impression of moonlight streaming into the room.

The tree was positioned behind the panel to add some texture to the shot.

The Botero background was positioned on a C-stand to intersect with the edge of the panel to create the corner of our bedroom set.  We lit that with an AB800 with a grid and a red gel.

A 3rd AB800 with a grid was positioned high above the set on another C-stand behind the model for her hair light.

A 4th AB800 was used as her main light.  To keep the lighting consistent with the look of the film, this was gridded and aimed at the model's face.


We deliberately chose not to use any softboxes to light our model as we wanted to keep the feel of old hollywood style lighting and to match the look of the film.


We shot this series mainly with a Sony a7rii and a Canon 85mm f1.2L lens mounted with a Fotodiox adapter.  For the headshots, we switched to the Sony 70-200mm f4 G Lens.


For shots with the full Morticia Addams dress, I wanted to use a ring light to add a little bit of fill to see the texture of the dress.  Unfortunately the mount for the ring light was broken and there was no way to mount it on a stand.  We opted to place it on the floor and bounce it into a white V flat instead, which worked out pretty well.

See the entire NSFW set on Zivity!

Thursday, August 25, 2016

Review - Think Tank Photo Airport Roller Derby - A Roller Bag for Mirrorless?

While most mirrorless shooters would be content with a small backpack or sling bag to hold their gear, I've found that a lot of times having the right sized rolling bag is much better, especially when shooting weddings.

Back when I was still shooting with Canon DSLRs, I lugged everything around with the Think Tank Airport Security 2.0.  This is still one of the best camera roller bags I've ever owned - it holds a TON of gear:


When I switched over to Sony mirrorless cameras, I found that the Airport Security 2.0 was now too big for my needs.  Since the majority of the interior of the bag is around 8" deep, the smaller lenses of the Sony system like the 55mm f1.8 Zeiss just disappear.


There's a lens in here somewhere . . .


... there it is!

So I started looking around for a smaller roller bag that would be better suited for the smaller bodies and lenses. Then I looked at Think Tank Photo's Airport Roller Derby Rolling Camera Case.


Smaller, shallower, and nearly 3 pounds lighter than the Airport Security 2.0, the Airport Roller Derby is almost perfect for a professional mirrorless shooter.


This bag holds everything I take to a typical wedding shoot:

Sony a7RII body + battery grip
Sony a7II body + battery grip
Sony A6300 body
10-18mm f4 Sony lens
16-35mm f4 FE Zeiss lens
24-70mm f4 FE Zeiss lens
70-200mm f4 FE Sony G lens
85mm f1.4 FE Sony G Master lens
55mm f1.8 FE Zeiss lens
35mm f2.8 FE Zeiss lens
30mm f3.5 Sony Macro lens
Phottix Mitros+ flash (2)
Phottix Odin transmitter
Think Tank Pixel Pocket Rocket with 10 SDXC cards
Sony USB portable power supply
12" iPad Pro + Apple Pencil
13" Macbook Air + power supply
10 Sony batteries
Sony Battery charger
Rotolight Neo LED light

All of this fits perfectly in the Roller Derby, and still leaves room for more.


Like the Airport Security, the Roller Derby comes with a TSA padlock and an integrated cable in an external pocket.

While the zippers are lockable, the bag does not include the handy integrated TSA lock for main compartment like the Airport Security 2.0

Integrated lock on the Airport Security
Not on the Roller Derby

Most of the central space in the Roller Derby is about 7" deep and the sides are about 8" deep.


While you might think a one inch shallower depth (compared to the deeper Airport Security) is minor, it makes a huge difference when accessing the smaller lenses of mirrorless systems.


The two a7 series bodies with battery grips fit perfectly in the deeper sides of the bag.


They are also deep enough to make dual layers, which is what we did for our two Phottix flashes.


Because of the way the Roller Derby is designed, the bottom of the main compartment actually extends past the zippered opening by about an inch. This means there is a slight overhang which is something to keep in mind when configuring the layout of your gear.


You probably will not want to put smaller things like your card wallet in that part of the bag as it will be difficult to get to. I chose to let the longer items like the 70-200 lens and the Phottix flashes use up most of that space.  The 85mm in the middle is a little difficult to get out at times, so I'm still experimenting with the organization.


When it comes to airline travel, my absolute favorite feature of this bag is the 4 wheeled design. 


On every flight I've been on, both inter-island and international, the aisles are just barely wider than the width of your typical two wheeled carry-on suitcase. Since most rolling camera cases are similarly sized, they just barely fit through the aisle of the plane and then only if you roll it in the exact center of the aisle.


Whenever I rolled a two wheeled camera case behind me when getting off on or off the plane, it would almost always end up catching a stray hanging seatbelt buckle and cause me to stop and make everyone behind me wait while I untangled it.

Eventually I got tired of this happening and just started carrying the bag in front of me to save time whenever we exited the plane, which kind of defeated the purpose of having carry-on luggage with wheels in the first place.

With the four wheeled design of the Roller Derby, this is no longer an issue. By simply rotating the bag and rolling it in front of me, it easily glides down the center of the aisle with lots of space on either side.


If you're a mirrorless shooter in the market for a rolling camera case, I highly recommend checking out the Think Tank Airport Roller Derby.   While it doesn't have some of the features of the larger Airport Security 2.0,  the more compact size is better suited for the smaller bodies of mirrorless systems.  If you travel a lot, you will REALLY appreciate the 4-wheeled design.

If you purchase this or any other Think Tank Photo products via the links on this page, you help support this site and make it possible to continue to do reviews like this. Mahalo!